Tableau Connector Setup Guide
Sync HubSpot data to Tableau for drag-and-drop dashboards, visual analytics, and fast data visualization.
Index
- Introduction
- Account Creation
- Activation
- User Panel
- Tableau Setup
- For Mac Users
- How to Uninstall the app
- Beta HubSpot API's
- Opt-In Tables
- Data Sync
- Data Security
Introduction
The Datawarehouse.io HubSpot + Tableau Integration connects your HubSpot data to Tableau’s powerful analytics platform. By syncing your HubSpot data to Tableau, you can use Tableau’s intuitive drag-and-drop tools to build dynamic dashboards, discover insights, and share interactive visualizations—no manual exports or coding required.
Please note this connector does not work with Tableau Public.
Account Creation
- Create an account at app.datawarehouse.io
- Select the HubSpot Tableau Connector on the dashboard or in the left hand menu.
- Click the Start Trial button.
- You will be re-directed to an authentication page. Please click the Authorize button.
- Login to HubSpot if you are not already logged in and select the HubSpot account you wish to connect too.
- Authorize the app to connect to your HubSpot portal by clicking the Connect App button.
- Select the refresh rate that you want your HubSpot data to sync into Tableau.
- You are then re-directed to the checkout screen. Please fill out all required information in order to activate your service.
- Success! You are all signed up and can now visit the Tableau Connector section of the app to view your connector details.
- Continue to Tableau Setup for how to plug your HubSpot data into Tableau.
Activation
Once you have successfully signed up, we will activate your app. Upon activation an email with your connector details will be sent to you. You can also retrieve them from the User Panel.
User Panel
You can visit the User Panel to perform the following self service administrative actions for your connector database.
- Re-send your credentials to the email address associated with your order.
- Reset the password of your connector database
- Update your Order information
- First Name
- Last Name
- Company Name
- Change your Database information
- Database Name
- Database Username
- Define your sync time
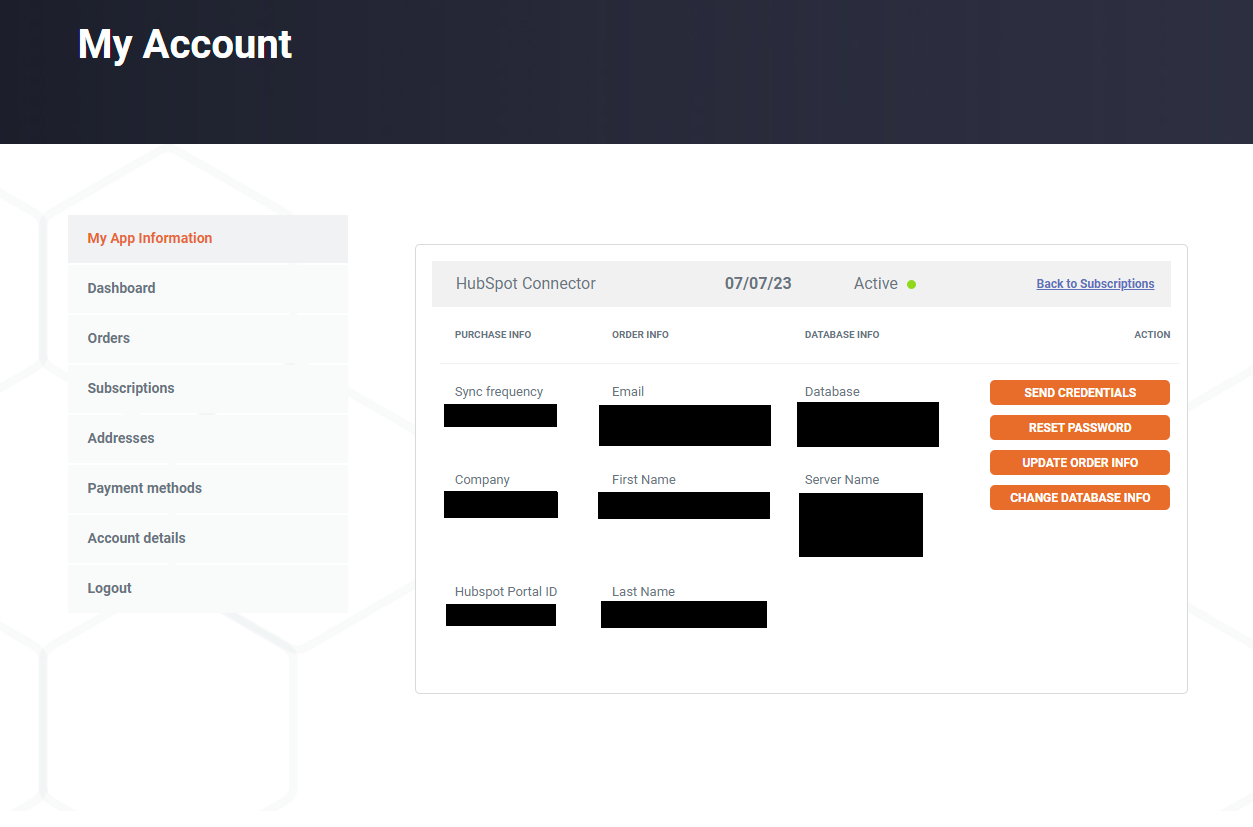
Tableau Setup
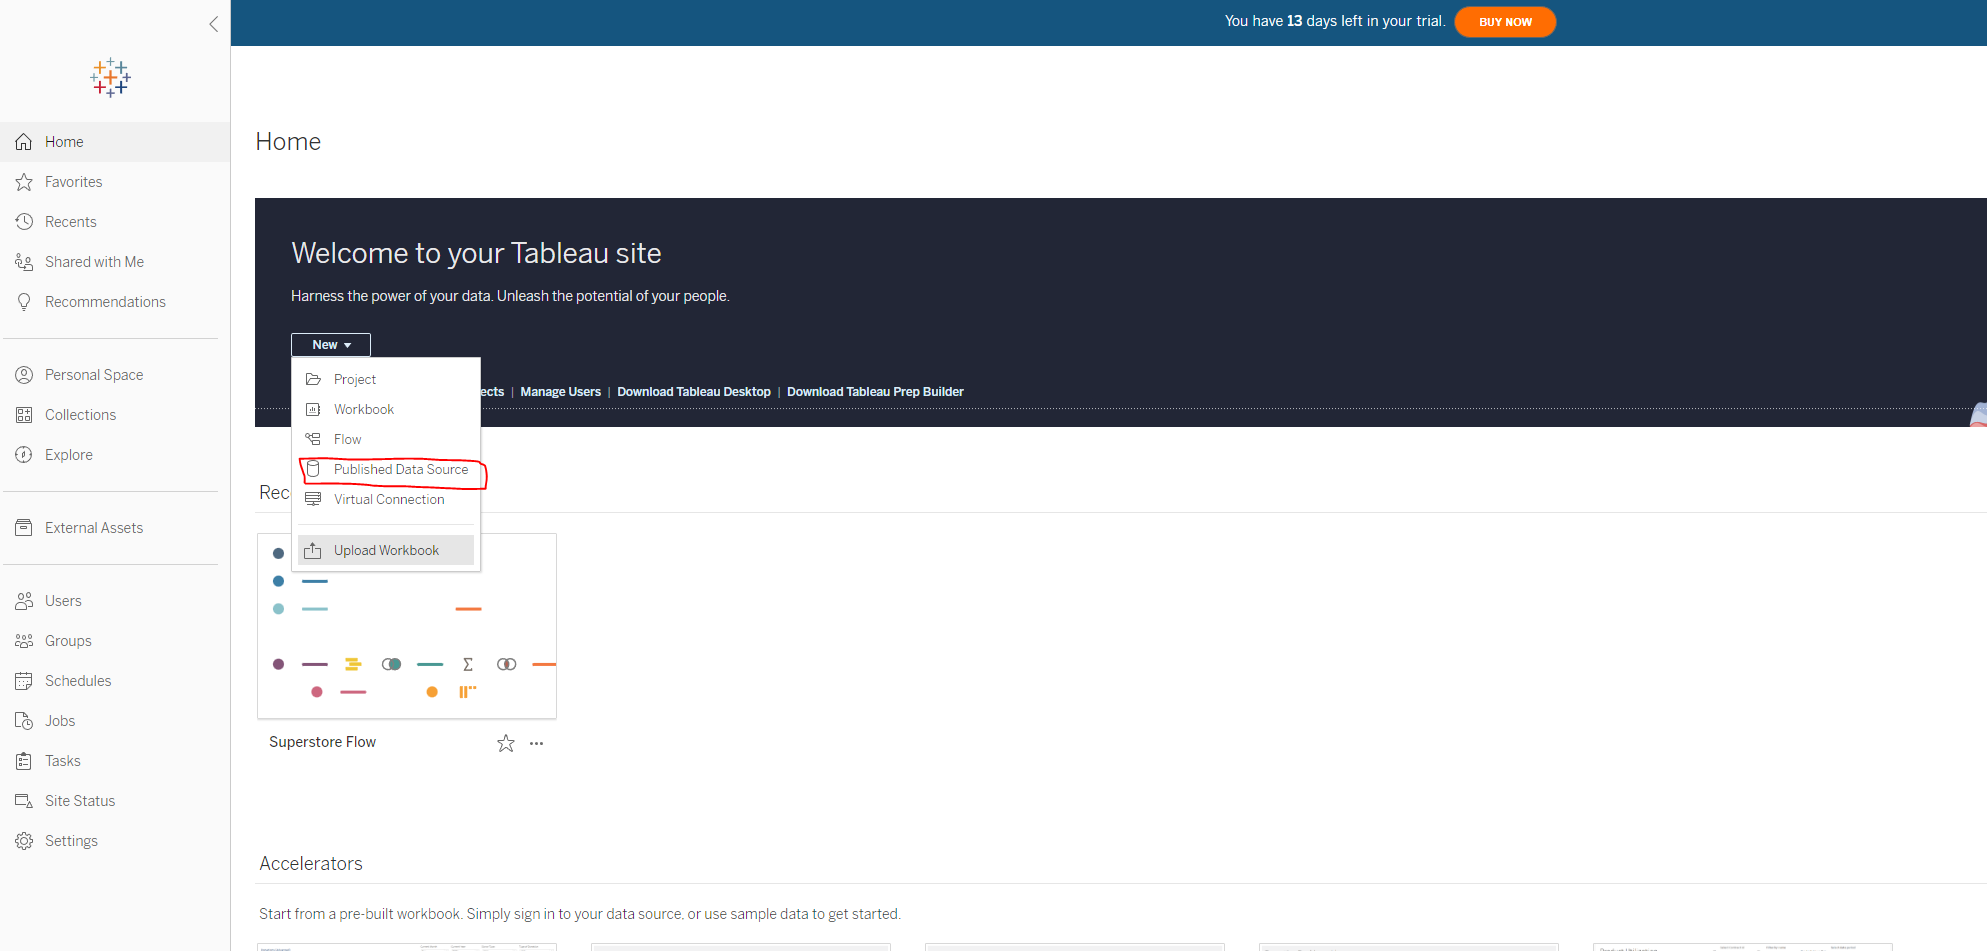
1. Start Tableau and click "New" to add a new Published Data Source.
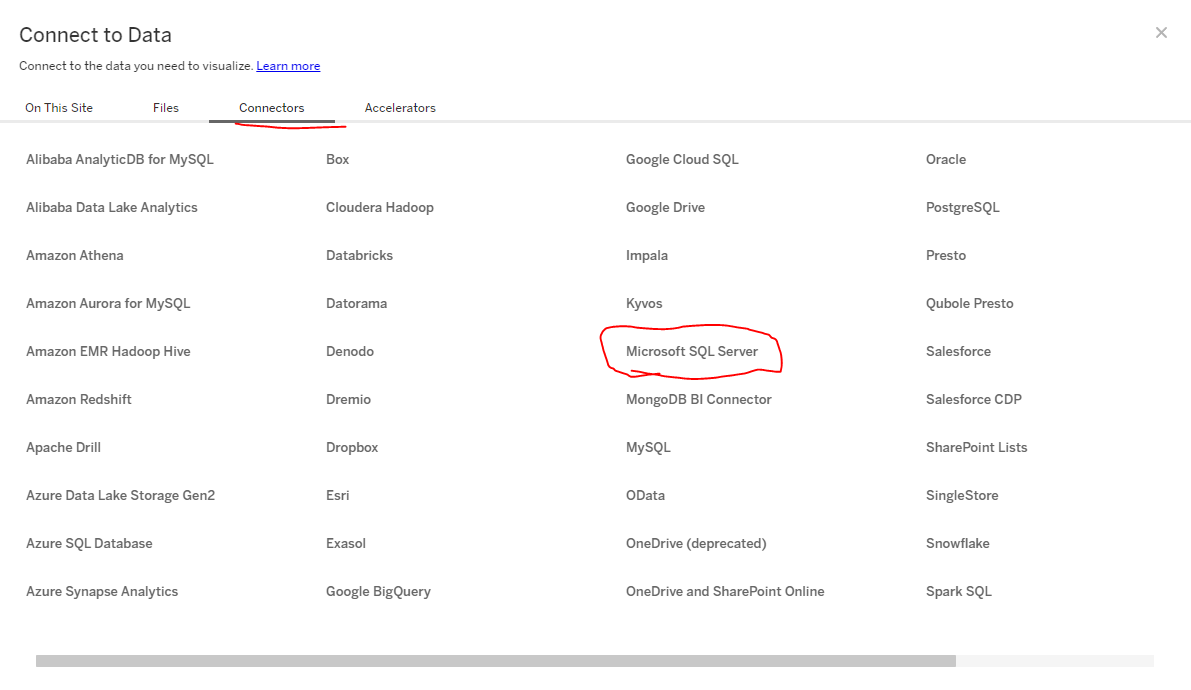
2. For published data source select the Connectors tab and select Microsoft SQL Server.
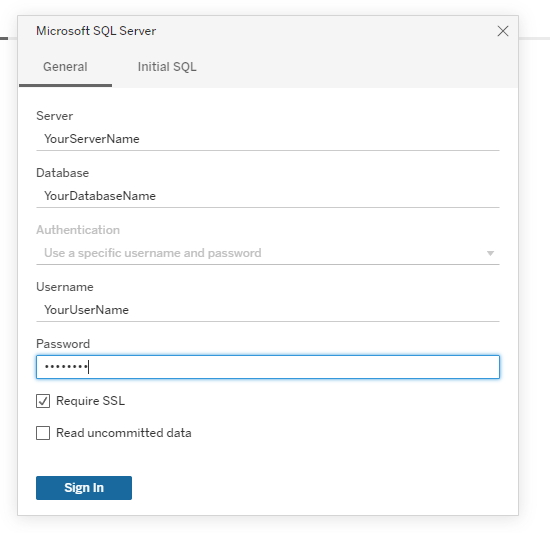
3. Enter your Tableau Connector Server, Database, Username, and password. These were sent to you via email after you signed up. The server name should be entered without a http:// prefix. You must enter that information exactly as it written in our delivery email. Some email providers automatically hyperlink the server address. Do not copy the hyperlink. Simply copy paste the text and enter it in the Server field below. (You may also be asked to enter a port. In that case the port you should enter is 1433)
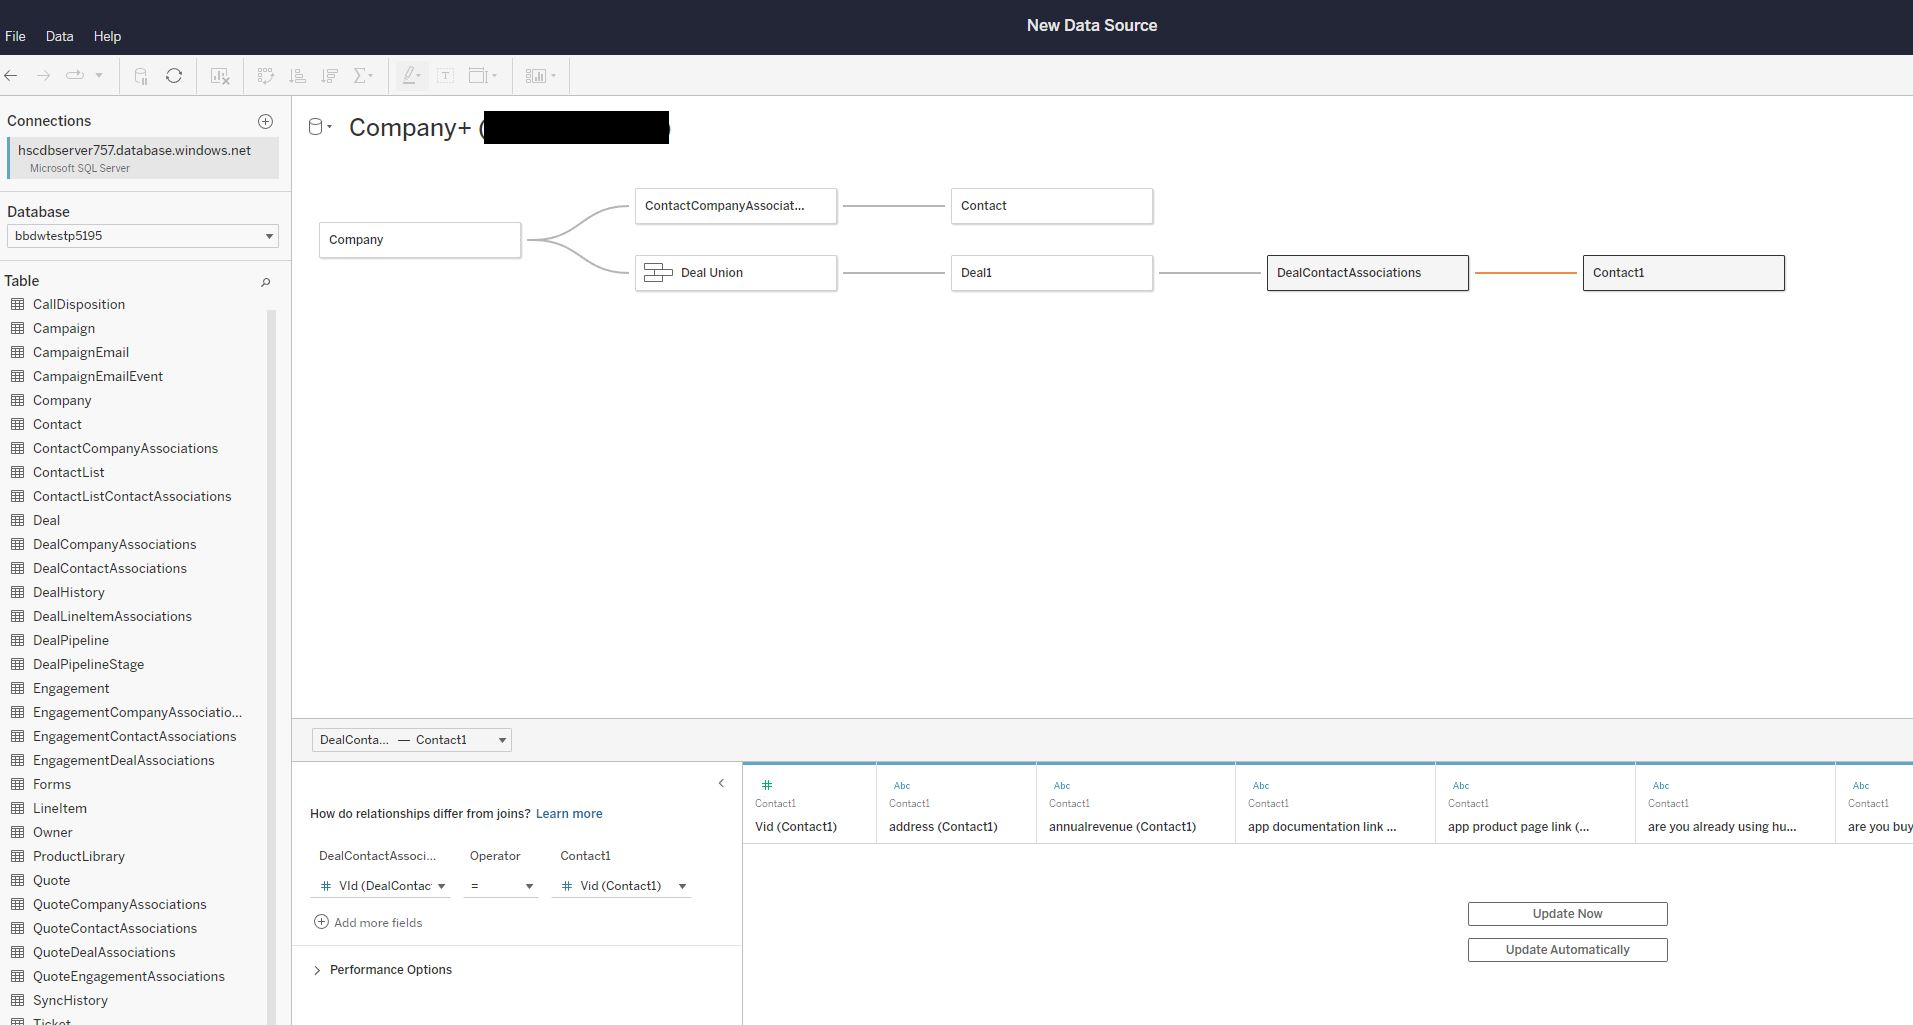
4. Drag and drop the data tables you wish to use in your reports, and join them using unions with the keys that relate the tables together. You may have the add the data source more than once to get all of your data in.
For example you can add deals and then join everything that relates to deals and then add that as a data source, then start from the first step and instead this time add campaigns and then join all related campaigns data. An ERD that shows you how the tables relate can be found here.
Below you can see how as an example you can relate the various data tables together. Sometimes the keys to relate the tables will automatically detect and other times you will have to enter them in. Feel free to enter the same table more than once if the relationships call for it. As you can see in the example below it has the contact table and deals table in there twice.
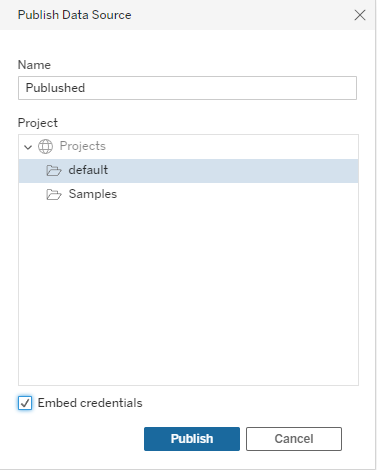
5. When publishing your data source be sure to select the Embed credentials so you do not have to re-authenticate each time you wish to use the data source. (When saving embedded credentials you may be asked to enter a port number. In that case the port you should enter is 1433)
6. If you have selected Data "Live" you may have issues connecting to the service. We recommend selecting Extract. 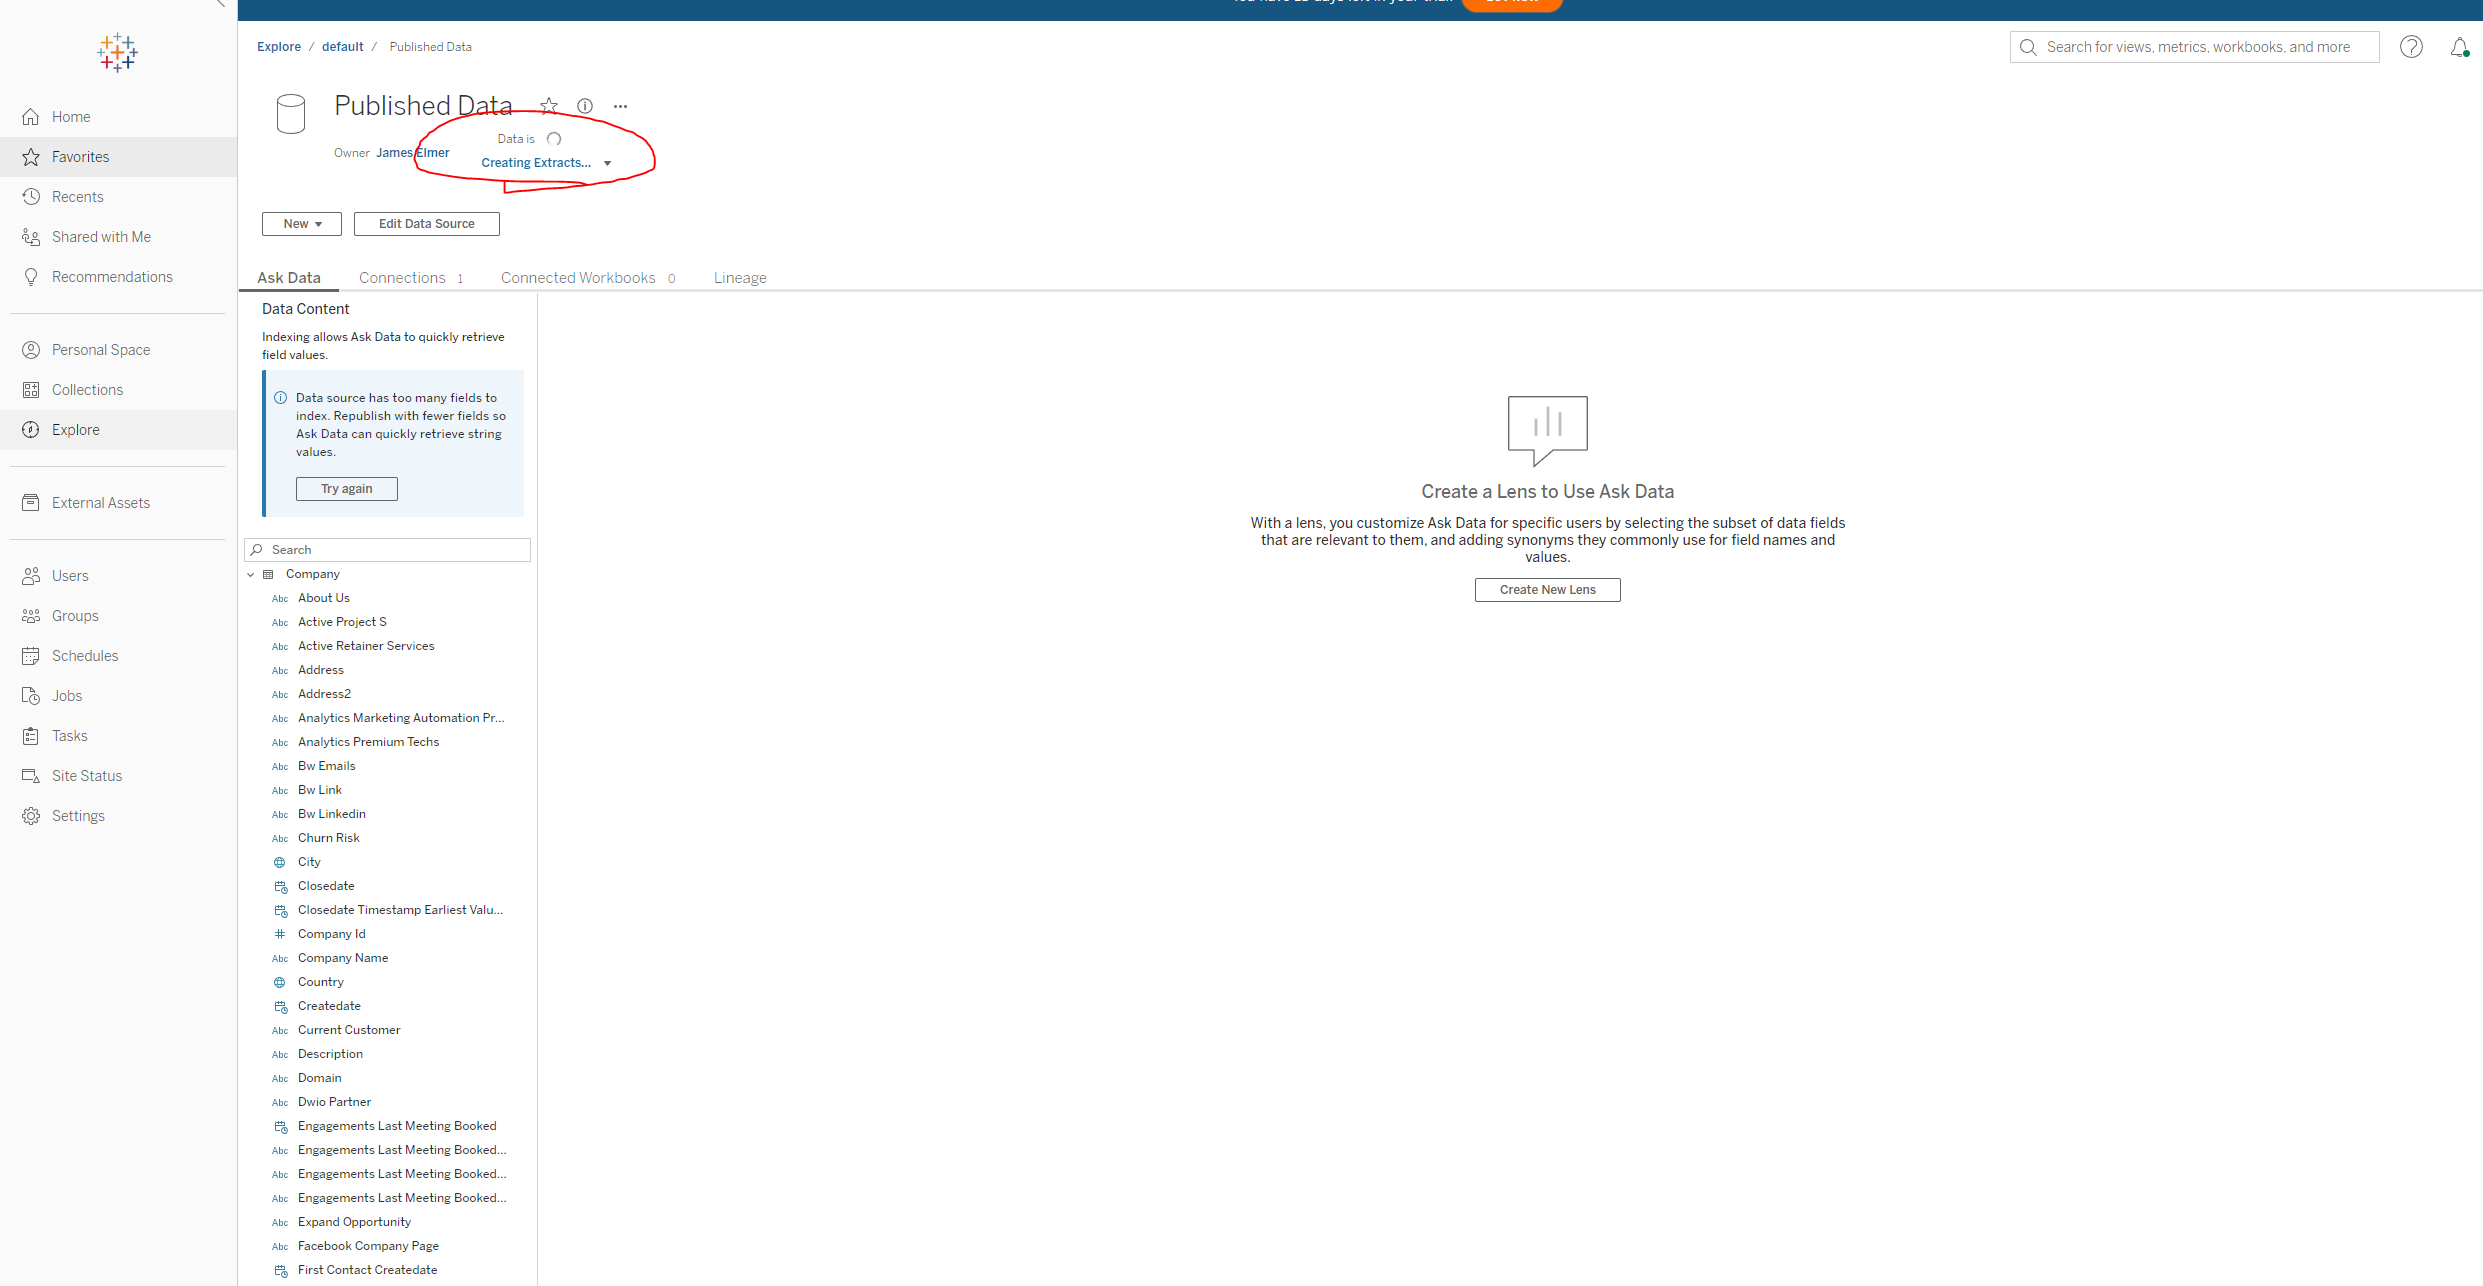
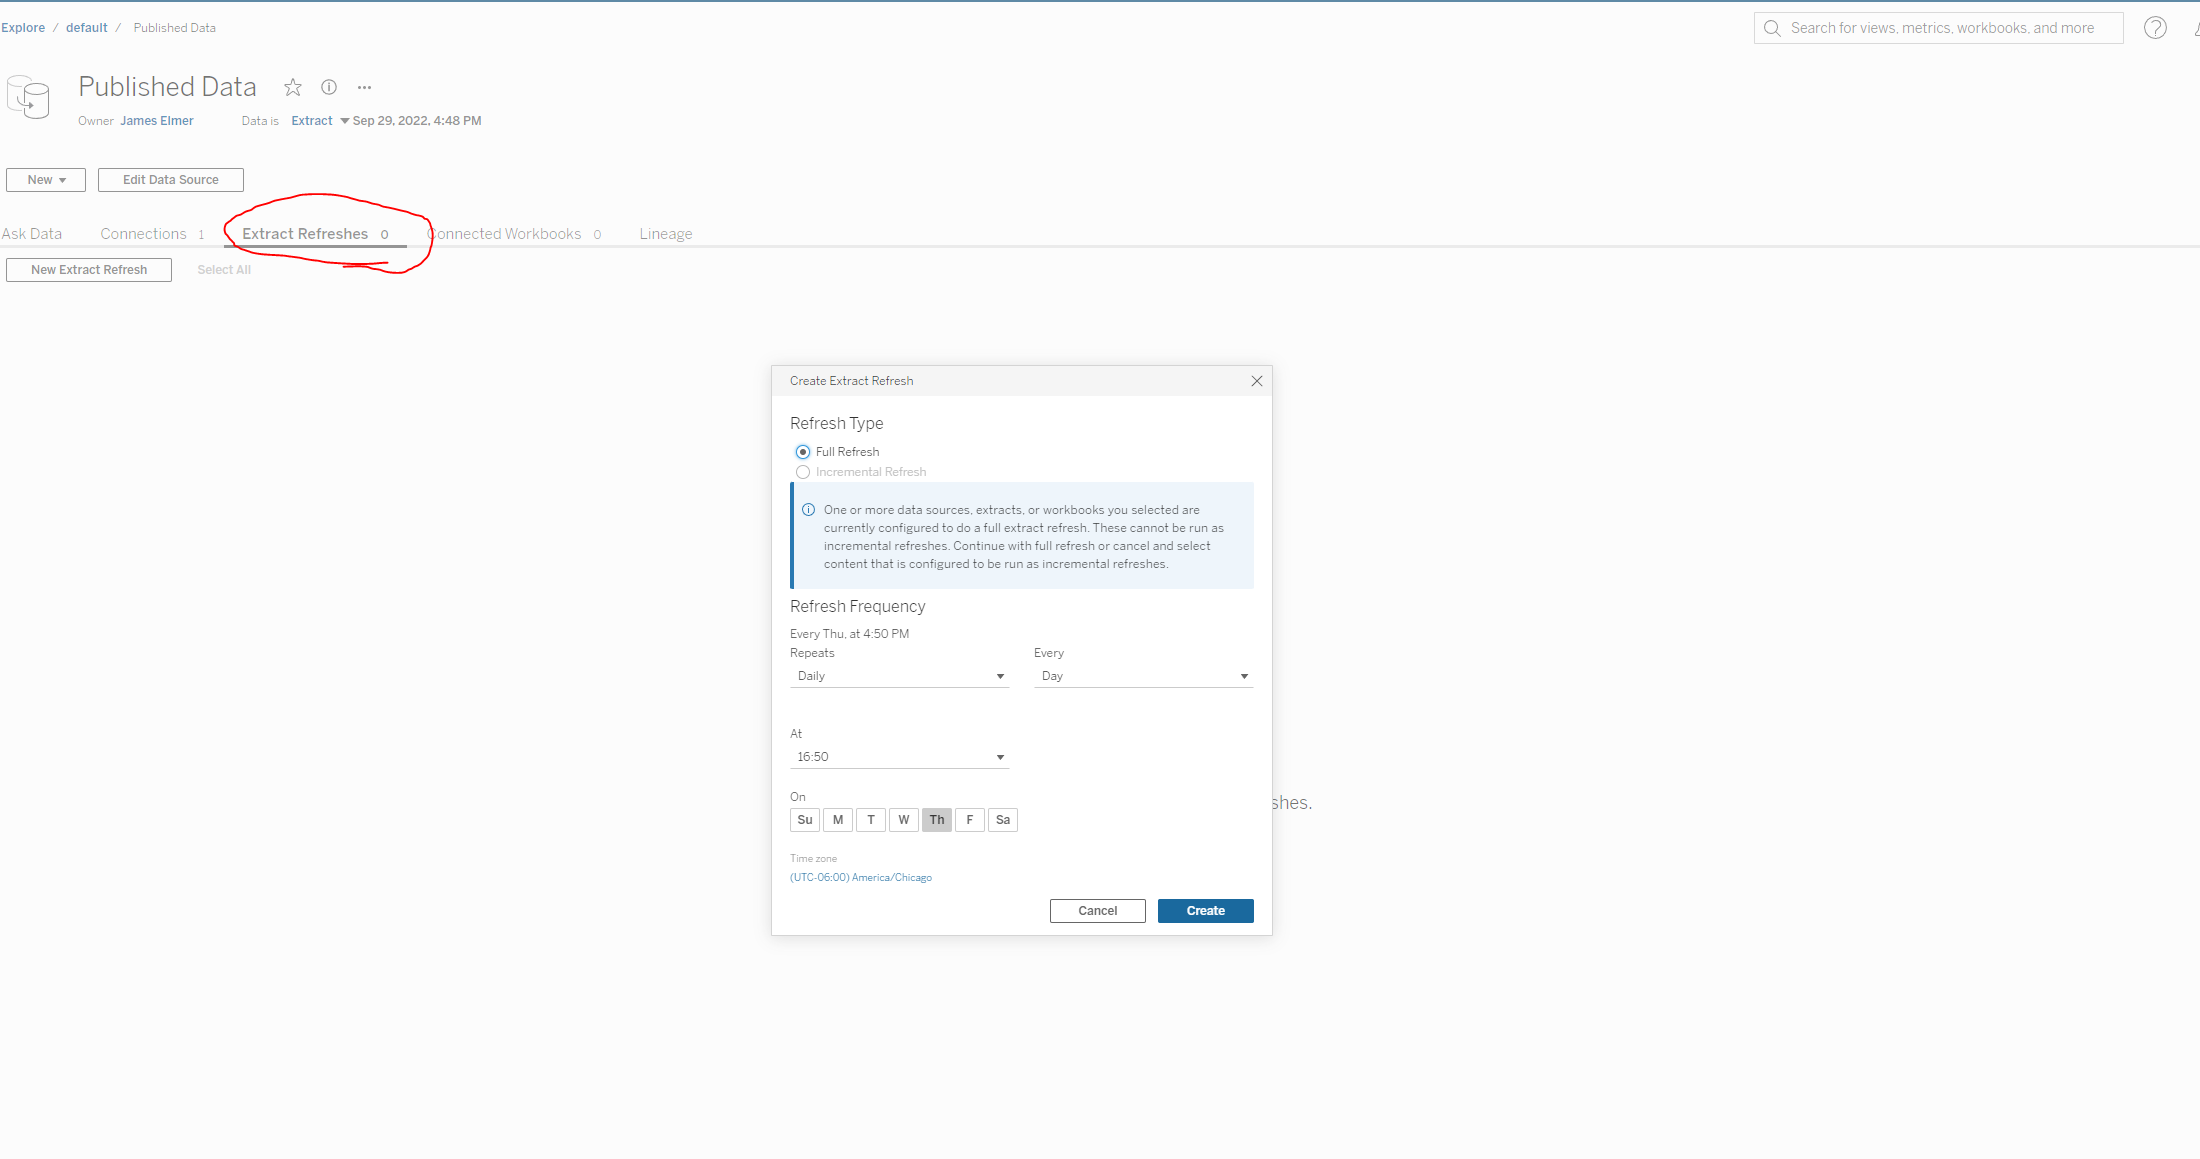
7. After selecting extract, you will need to schedule your refresh. Please refresh only as often as the connector data does. This is determined by the version of the Tableau Connector app you purchased. To schedule your refreshes select the extract refreshes tab and then schedule your extracts with the prompt shown in Tableau.
8. Begin building your dashboards and reports using the robust functionality that Tableau offers.
For Mac Users
In order to connect to Mac on your desktop or laptop you will need to install MS SQL Server drivers.
Please follow this guide in order to do that.
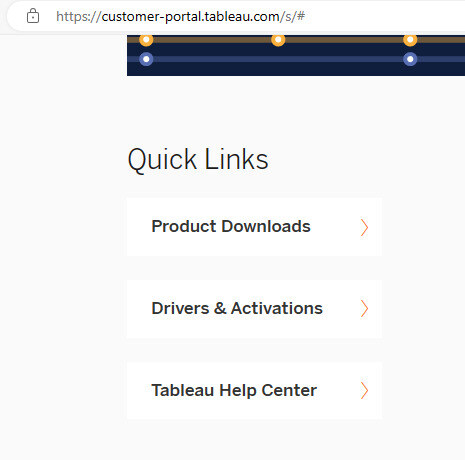
a. Log into the Tableau Customer Portal
b. Navigate to the bottom of the Product Downloads page to locate the driver.

c. Run the installer.
d. Accept the defaults.
e. Open the Tableau application and connect to your database.
If you have further issues please contact Tableau support. Our service is fully compatible with Tableau desktop and does not require any whitelisting of Tableau desktop or Tableau cloud.
How to Uninstall the app
*Please note this does not cancel your subscription. To do that please visit https://app.datawarehouse.io/account/subscriptions
1. Open up the HubSpot Portal that you have installed the app in. In the top right section of HubSpot click on the house icon.
2. A menu will drop down. Click on the Connected apps link.
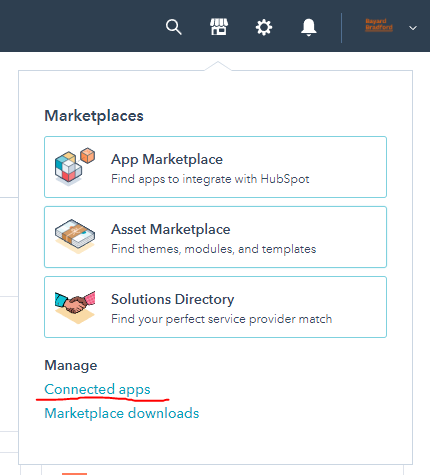
3. Then click on the actions button for the Tableau Connector. And click uninstall.
Beta HubSpot API's
This app utilizes the following beta API's:
ChatflowThread and ChatflowMessage data tables contain Chatflows data and is powered by the beta API listed below.
More information about beta APIs can be found in this supporting documentation.
Opt-In Tables
The following tables are available for opt-in as they tend to be larger, advanced data sets and can take up a significant amount of storage and API Calls. You can submit a support request with your database name at https://datawarehouse.io/opt-in-data-types/ or email us directly with your database name at help@datawarehouse.io to ask for these to be enabled. There is no additional cost to enable these tables.
- ContactWebEvents
- CustomEvent
- ContactSubscriptionType
- ChatflowThread
- ChatflowMessage
- TicketPropertiesHistory
- DealPropertiesHistory
- ContactPropetiesHistory
- CompanyPropertiesHistory
- EngagementsHistory
- CampaignContactAssociations
Data Sync
Data syncing will be done at intervals determined by your plan.
Please allow at least 24-48 hours from activation for the initial database to be built. Once it is built it will refresh at the rate determined by your plan.
Data Security
- Only you will have "read only" access to your database. You can make changes in Tableau, but they will not be reflected in HubSpot.
- User authentication for HubSpot is done using OAuth 2.0 protocol as per the best practice in industry.
- This application is GDPR Compliant.
- If you have trouble accessing the database due to your internal firewall restrictions please have your IT department open outbound TCP Port 1433
- If there is information missing from a property it could be because that fields is improperly configured in HubSpot.
