HubSpot Looker Studio/Google Data Studio Connector Setup Guide
Use Datawarehouse.io to Sync HubSpot data to Looker Studio for easy reporting and unified analytics.
Index
- Introduction
- Account Creation
- Activation
- User Panel
- Looker Studio Setup
- How to Uninstall the app
- Beta HubSpot API's
- Opt-In Tables
- Data Sync
- Data Security
Introduction
The Datawarehouse.io HubSpot + Looker Studio (formerly Google Data Studio) Integration empowers business analysts and decision-makers to transform HubSpot data into interactive, actionable insights—eliminating the challenges of manual Excel exports or fragmented data processes.
This app automates the synchronization of your HubSpot data into an Azure SQL database, granting you direct, flexible access within Looker Studio’s robust reporting and visualization tools.
With this integration, users can easily join, blend, and display HubSpot data alongside other sources, enabling more dynamic dashboards, streamlined analysis, and better-informed decisions.
If you’re looking to connect HubSpot to the core Looker platform rather than Looker Studio, please refer to the dedicated Looker Connector Manual for step-by-step guidance.
Account Creation
- Create an account at app.datawarehouse.io
- Select the HubSpot Looker Studio Connector on the dashboard or in the left hand menu.
- Click the Start Trial button.
- You will be re-directed to an authentication page. Please click the Authorize button.
- Login to HubSpot if you are not already logged in and select the HubSpot account you wish to connect too.
- Authorize the app to connect to your HubSpot portal by clicking the Connect App button.
- Select the refresh rate that you want your HubSpot data to sync into Looker Studio.
- You are then re-directed to the checkout screen. Please fill out all required information in order to activate your service.
- Success! You are all signed up and can now visit the Looker Studio Connector section of the app to view your connector details.
- Continue to Looker Studio Setup for how to plug the app into Looker Studio.
Activation
After your signup and checkout are complete, we’ll activate your account and provision a dedicated Azure SQL database containing your HubSpot data. You’ll receive an email with your server credentials so you can start connecting and building reports.
User Panel
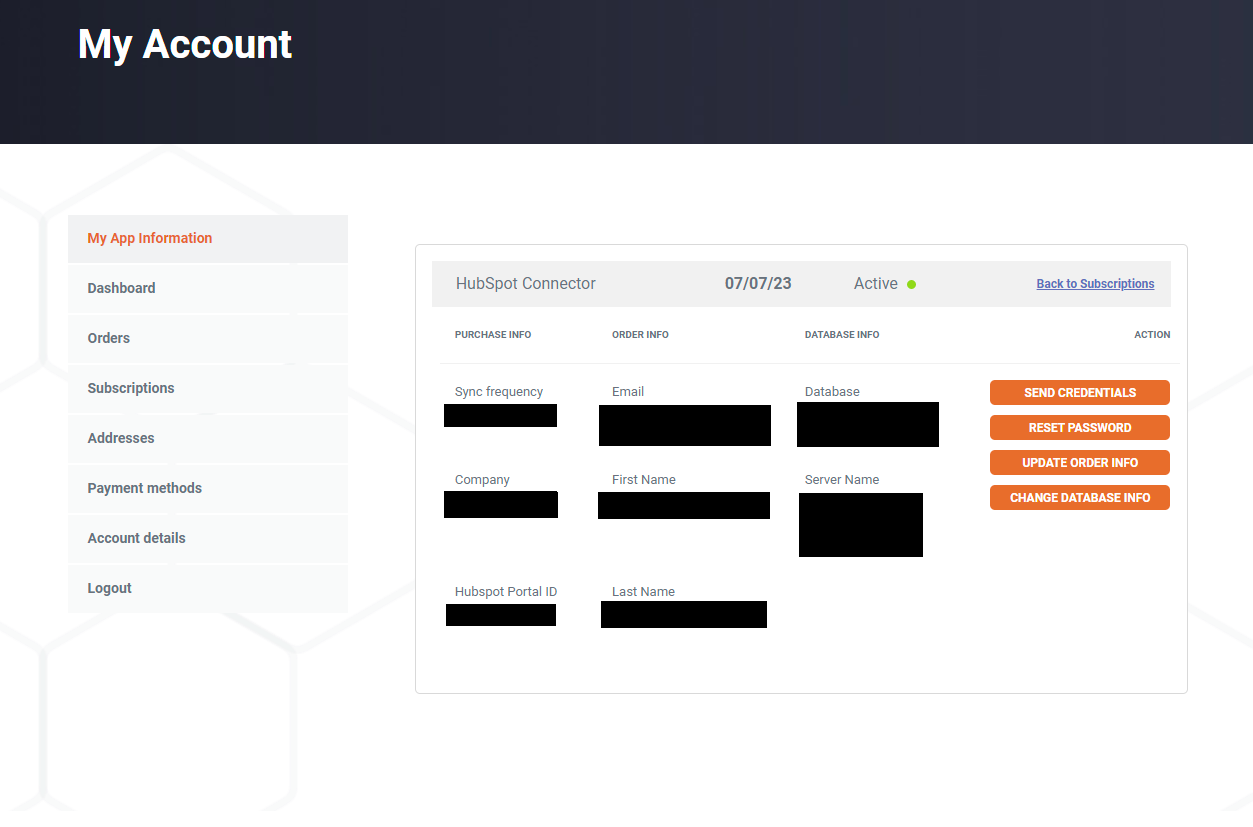
You can visit the User Panel to perform the following self service administrative actions for your connector database.
- Re-send your credentials to the email address associated with your order.
- Reset the password of your connector database
- Update your Order information
- First Name
- Last Name
- Company Name
- Change your Database information
- Database Name
- Database Username
- Define your sync time

Looker Studio Setup
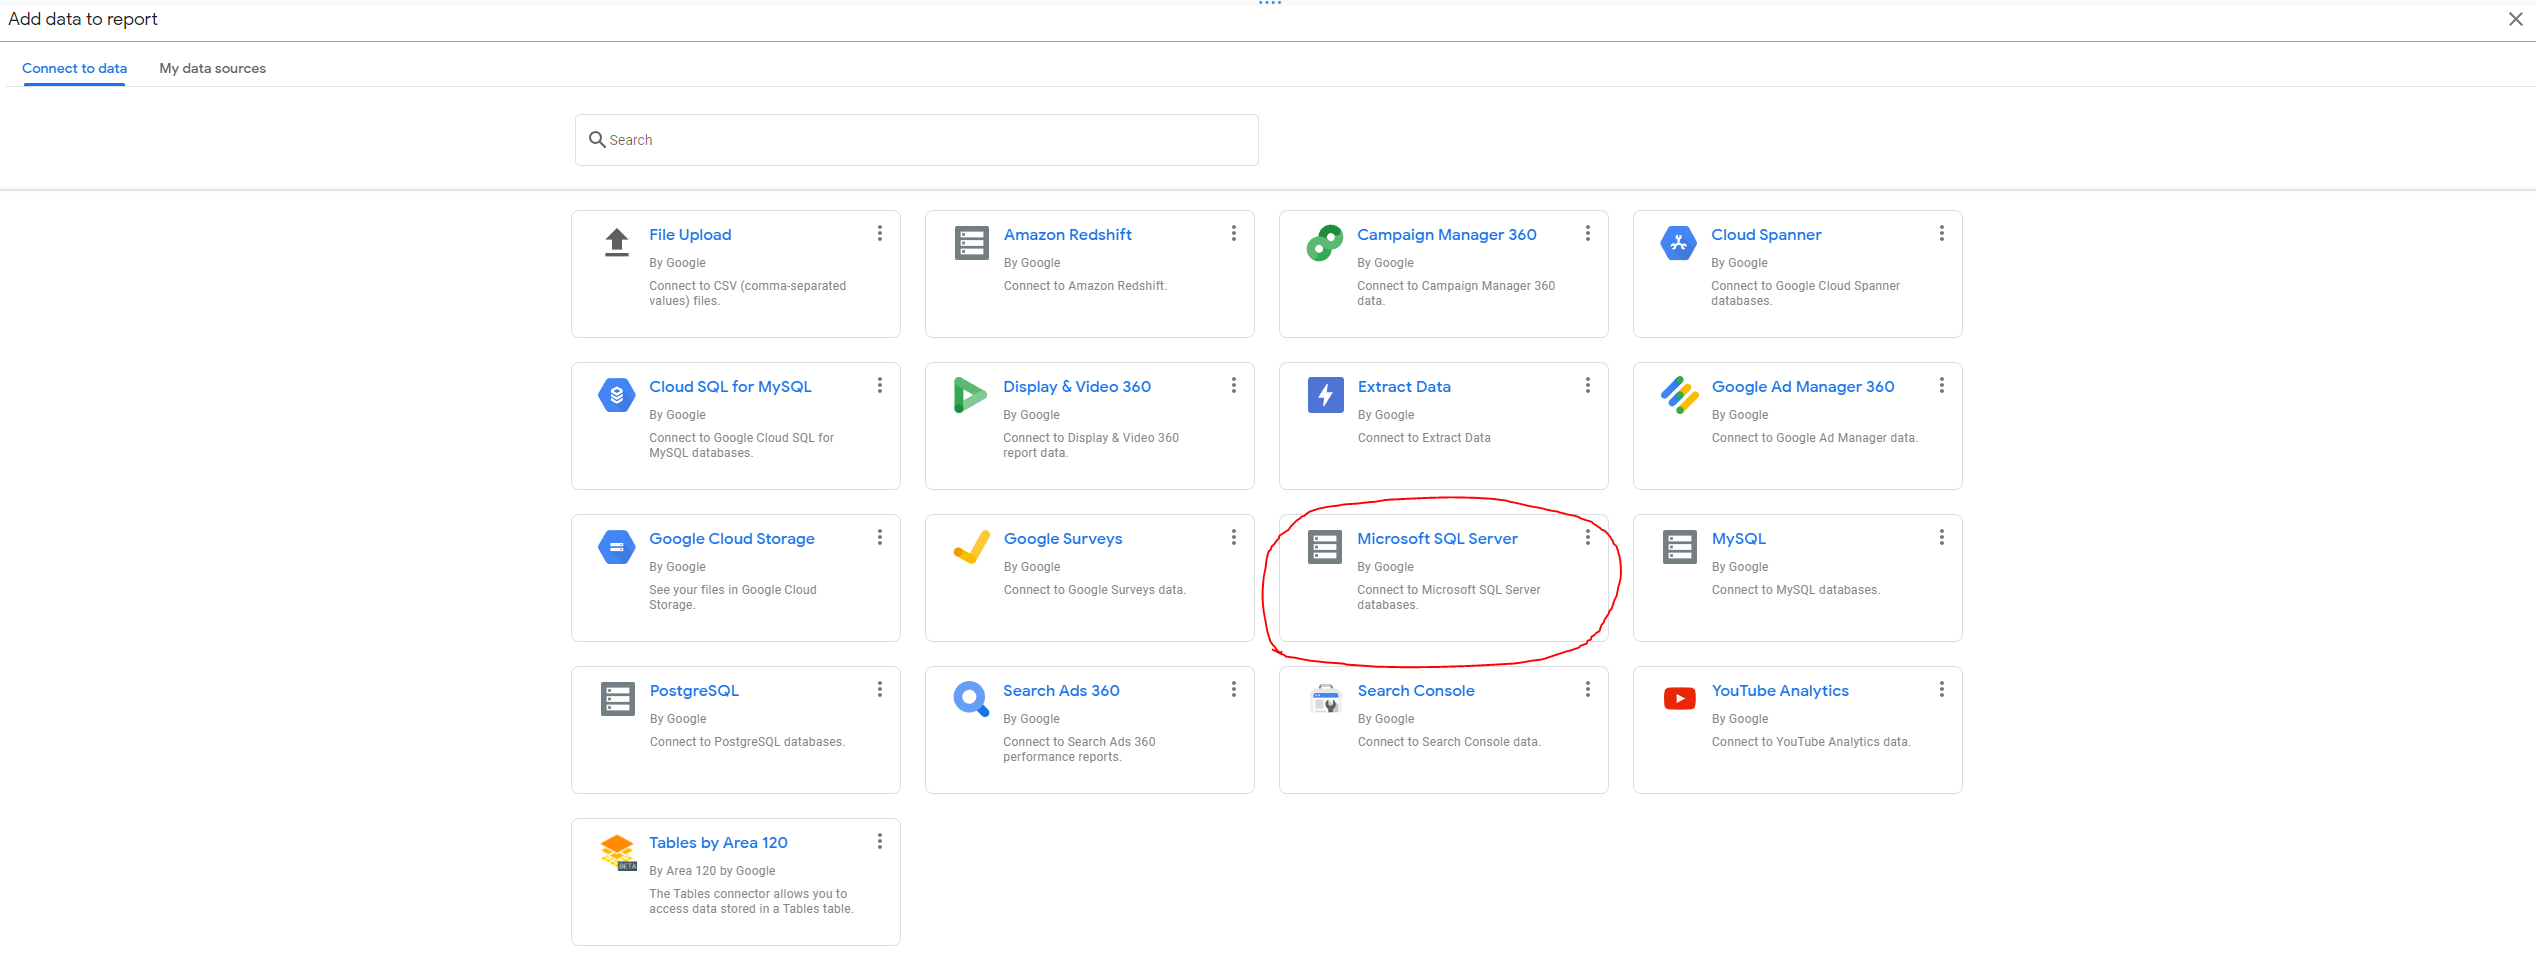
When you open a new or existing Looker Studio document or explorer and want to use the HubSpot Connector, please select the "Add Data" button at the top of the application. We recommend first using the Data Explorer function to load and join the various tables so that it is easier to use in your reports.
Once the Add window appear, please select Microsoft SQL Server.

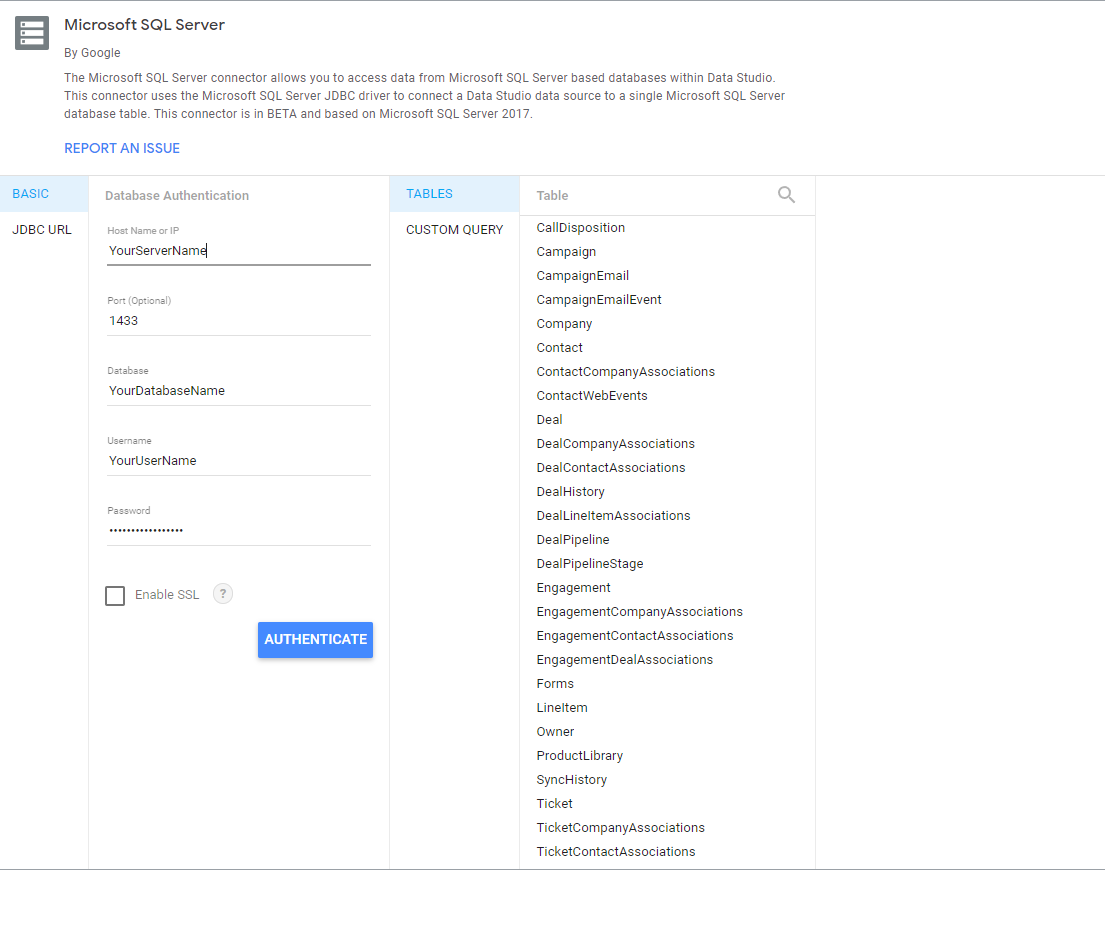
On the next screen, you must enter your Server name into the Host Name field, the Port, your Database Name and your Username and Password. This is demonstrated in the image below. Then select authenticate and all of your data tables will appear ready to use.
Your Server name should be entered into the Host Name field without a http:// prefix. You must enter the Server information exactly as it written in our delivery email. Some email providers automatically hyperlink the Server address. Do not copy the hyperlink. Simply copy paste your Server and enter it in the Host Name field shown below.

You will have to repeat the above steps to add each table. This is a limitation in Looker Studio. If you use the "Explore" function, you can add all the tables and join them before creating your reports. We recommend you do that if possible.
Please use this ERD to learn how to best connect the various data tables together.
You can learn how to do joins and blends in Looker Studio here.
Allow at least 24-48 hours from activation for the initial database to be built. Once it is built it will refresh at the rate determined by your plan.
How to uninstall the app
*Please note this does not cancel your subscription. To do that please visit https://datawarehouse.io/account/view-subscription
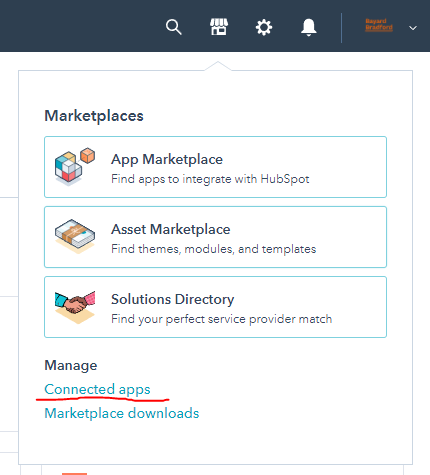
1. Open up the HubSpot Portal that you have installed the app in. In the top right section of HubSpot click on the house icon.
2. A menu will drop down. Click on the Connected apps link.

3. Then click on the actions button for the Looker Studio Connector. And click uninstall.
Beta HubSpot API's
This app utilizes the following beta API's:
ChatflowThread and ChatflowMessage data tables contain Chatflows data and is powered by the beta API listed below.
More information about beta APIs can be found in this supporting documentation.
Opt-In Tables
The following tables are available for opt-in as they tend to be larger, advanced data sets and can take up a significant amount of storage and API Calls. You can submit a support request with your database name at https://datawarehouse.io/opt-in-data-types/ or email us directly with your database name at help@datawarehouse.io to ask for these to be enabled. There is no additional cost to enable these tables.
- ContactWebEvents
- CustomEvent
- ContactSubscriptionType
- ChatflowThread
- ChatflowMessage
- TicketPropertiesHistory
- DealPropertiesHistory
- ContactPropetiesHistory
- CompanyPropertiesHistory
- EngagementsHistory
- CampaignContactAssociations
Data Sync
Data syncing will be done at intervals determined by your plan.
Data Security
- Only you will have "read only" access to your database. You can make changes in Power BI, but they will not be reflected in HubSpot.
- User authentication for HubSpot is done using OAuth 2.0 protocol as per the best practice in industry.
- This application is GDPR Compliant.
- If you have trouble accessing the database due to your internal firewall restrictions please have your IT department open outbound TCP Port 1433
- If there is information missing from a property it could be because that fields is improperly configured in HubSpot.
